How to Do Nail Art

How to Do Nail Art
Steps
- Make sure your nails are in good shape. If they aren't, check out the related wikiHows for tips to keep your nails healthy and beautiful. You don't need a manicure to start creating nail art, but you do need to make sure that your nails are clean and shaped well enough that they look even. Also make sure that your cuticles are nice and healthy. (see cuticle wikihows)
- Choose the right products. There are a multitude of different paints and polishes available for nail art, and your choice of products is completely up to you. Experiment with a few different brands and types of polish or paint to see which you like best, and don’t forget to give acrylic craft paints a try—these work great and are a whole lot cheaper than nail paints or polish. You’ll also be able to choose from a variety of implements to help you apply your paint. You can buy professional-grade nail art kits that include all the brushes, stripers, and marbling tools you’ll need, or you can improvise. A toothpick or bobby pin, for example, can help you apply dots and swirl colors with precision, and thin-tipped detail brushes available at your local arts or hobby store can work just as well as special nail art brushes. In addition, remember that you can create art on your natural nails or on artificial tips, and the variety of artificial nails is truly dizzying. Perhaps most importantly, though, make sure you have pure acetone for quickly removing mistakes, and have a small brush and / or Q-Tips available solely for applying the acetone.
- Look for ideas and techniques. This article is a good primer, but if you have trouble coming up with ideas after a while, or if you want to get more in-depth information about techniques, consider taking a class at your local nail salon. Just a few hours with a professional teacher can advance your skills like years of practice. There are also a number of books on nail art; you may be able to find one in your local library or bookstore, but if not you buy them online. Finally, the web is a great resource, especially if you’re just looking for new ideas. There are several sites on which people post their latest creations, and you can also find a few forums frequented by beginners and pros alike.
- Get your materials ready. While nail art requires a lot of patience, you’re also constantly working against the clock when you’re creating it, since the paints and polishes dry fairly quickly. Before you begin, make sure you have everything you need ready and accessible, especially acetone for quickly removing mistakes.
- Give your nails a base coat. Before you begin your nail art you need to create your canvas. Depending on the look you’re going for, you can paint your nails a neutral color, such as clear, white, pale beige or pink, or you can paint them any other color you desire. You may also wish to divide the nail into two or three different colors. Do two coats, as it strengthens the nail and gives a better finish. Make sure your “canvas” is neat and even, and allow it to dry thoroughly before proceeding.
- Create your nail art on top of the base coat. Roll your brush or other tool in one color of paint to make sure the paint adequately and evenly covers it. If your brush has globs, excess paint, or not enough paint, you’re going to have trouble painting. Keep your art simple. There’s plenty of room for creativity—you can create pictures, abstract designs, etc. to your heart’s content—but don’t make your nails look too “busy.” Simple designs are often the most beautiful, and if you’re a beginner your chances of success are far greater the simpler your art is.
- Apply a top coat. Once all your nail art is dry, paint over it with a clear protective acrylic top coat to seal and protect your nail and your hard work.
- Care for your art. Reapply a clear top coat every two or three days to protect your art and to keep your nails looking shiny, and apply cuticle oil daily. Treat your nails with care—wear gloves when gardening or doing other “doing work,” and exercise caution when performing tasks, such as opening soda cans, that may damage your nails.
Paint Simple Objects and Designs
- Draw designs or objects. Use a brush with a very thin tip to paint an outline of the object or design you’re painting.
- Fill it in your outline. You can use the same brush or a slightly thicker one to fill in your outline, either with the same color or with a new one. Apply one color at a time, and if your outline is a different color than the fill, allow the outline to dry first. Reapply paint to the brush as needed, and let each color dry before adding a new one.Add other colors to make new designs or add highlights. Once your first color is dry, you can add other colors either on top of the first or in other places on the nail.• Dip a striper brush, toothpick, or pin into the desired color. You can create dots of varying sizes by using thinner- or thicker-tipped implements. Lightly touch the implement to the nail.
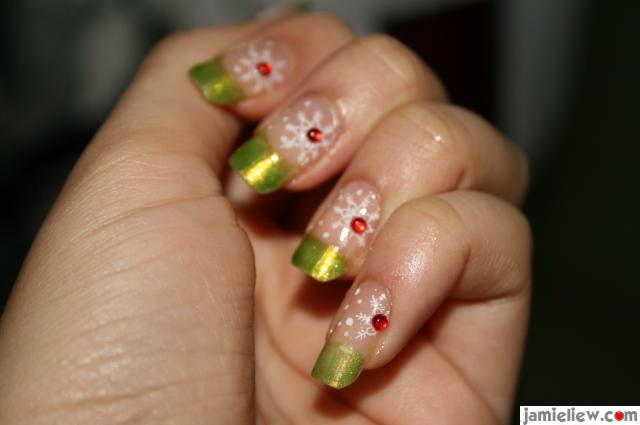
- Manipulate dots as desired. You can use dots to make abstract designs or even pictures. To make trailing dots, dip the implement in the paint once and apply several dots with it without reapplying paint. The dots will get smaller with each dot since less paint will remain on the implement. To make a simple flower, arrange five dots of one color in a circle with a dot of another color in the center. You can add a stem by painting a thin, curved, green line leading to the flower. You can also use your fine-tipped implement to drag the paint out from the wet dot to create rays, swirls, and other designs. You can also create your own designs to your fashion. All designs look great!
Blend Colors on the Nail
- Apply a dot of one color.
- Use a clean toothpick to apply a dot of another color on top of the first dot while the first dot is still wet.
- Use a clean toothpick, striper brush, or other implement to drag the colors outward together, or to swirl the dots together. You can also create a marble effect by randomly placing several dots of one color on the nail, then placing several dots of another color around and on top of the first set of dots, and finally swirling the dots around and together by moving your implement in a criss-cross, S-shaped, or figure 8 pattern.
Water Marbling
- Fill a shallow, wide-mouthed cup or bowl about 90% full with water.
- Add desired colors of paint to the water. Have your paints open and ready to go, as they will harden quickly on the surface of the water. Drop a drop or two of the colors you want to use on top of the water. A high-quality nail polish works best for this method.
- Create the marbled design in the water. Repeatedly drag a pin or toothpick through the surface of the water, causing the paints to coat the surface with the pattern of marbling you desire.
- Dip your nail into the water. Lay your nail face down on the surface of the water and slowly push it beneath the surface.
- Use a cotton swab to remove the excess polish from the surface while your nail is still submerged in the water.
- Remove nail from water and use a cotton swab (with acetone if necessary), to clean up the edges and remove polish from the finger.
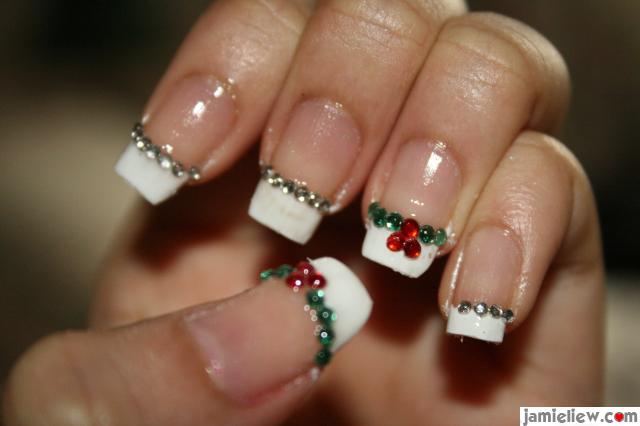
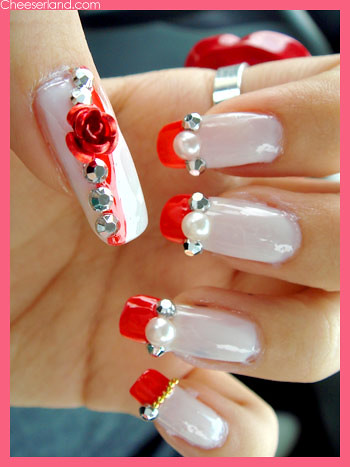
Apply Jewels or Stickers
- Use tweezers or a special applicator to dip small jewel or sticker into a drop of nail gel or nail glue. You can buy specially-made jewels and stickers from nail art supply stores, or you can use your own—just make sure they are small and have flat bottoms.
- Place jewel or sticker flat onto nail. Press down gently and allow to dry.
- Cover nail (and jewel or sticker) with clear gloss top coat.
Apply Glitter (3 methods)
- Mix glitter with nail gel or paint. Dip brush into mixture and brush the mixture onto the nail in desired shape or pattern. Let dry and apply top coat.
- Apply nail gel on nail only where you want to apply glitter. Dust the nail with glitter and lightly shake to remove excess. Allow the gel and glitter to dry, and use a small implement to remove any glitter that you don’t want. Apply top coat.
- Cover entire nail with nail gel or polish. Dust with glitter. Allow to dry and apply top coat.
To make leaves or flowers, take a tiny 'square' tipped brush and dip one corner into..for example.. dark green, and the other corner of the brush into a lighter green, make a nike swish like stroke onto the nail. You will see that it makes what resembles leaves. Depending on how you angle the brush. Practice it on a piece of paper. If you use other colors, it will make what looks like flower petals. Practice so you know how to do it. Try changing the angle you hold the brush. You can get the 'feel' for it this way. Just make a small quick stroke with the two colors loaded onto the brush. Then you can use a tiny pointy tipped brush to add the division between leaves or outline of a flower.
Tips
- If you want a design or picture that’s more intricate than what you can do on your own, but you don’t want to pay a professional to do your nail art, you can buy stickers or preprinted artificial nails.
- You can also airbrush your nails and use stencils or masks to create designs.
- Add gems to the edge of your French manicure or paint your team's flag in the corner. Also, white flowers on any color is a classic look.
- Start with something simple. Don’t try painting a miniature copy of the Mona Lisa on your first try: you’ll only mess up and get put off! Try flowers and letters, and build up gradually to complex designs.
- Make sure each color of nail art is completely dry before starting another color (unless you’re trying to blend them); if the first color is still wet it will smudge and ruin your art.
- Use different implements for different colors, or clean your brush or tool between each color, just as you would clean a paintbrush when you change colors.
Things You'll Need
- Toothpick, stylus pen, or thin-tipped brushes
- Nail polish or acrylic paints (several colors)
- Acetone (nail polish remover)
Warnings
- Some people may be allergic to some nail products. If you experience an adverse reaction to a product, thoroughly wash your hands, use acetone to remove it, if necessary, and discontinue using the product.
- Acetone and many nail polishes give off fumes and / or are flammable. Use in a well-ventilated area, and avoid fire, sparks, or smoking around these products or while they are wet on your nails.


How to Do Nail Art
Comments
Post a Comment
Dear Visitor,
Please feel free to give your comment. Which picture is the best?
Thanks for your comment.